Recently, I finished putting together my first NAS. A lot of the inspiration for this build came from Serve The Home, Jeff Geerling, & Hardware Haven. As the title says, I managed to get everything I need for less than $200 (pricing breakdown at the end). Here, I'll be digging into the how I found my parts, specs of my system, and benefits of this approach.
Disclaimer: If you are looking to build a known reliable NAS, anything for a commercial application, or anything otherwise mission critical, this is not the right approach. I am a homelabber at heart and this post is about building on the cheap as a means of learning new tools and technologies.
Finding Parts
The system runs on a i5-6500 (4c/4t) & 16GB of DDR4. It boots from a (used) 120GB Kingston SSD - NAS OS's don't really hit the OS drive much so I saved money here. Additionally, it has a (also used) 256Gb Toshiba NVMe M.2 drive that I've set up as an L2 ARC cache. Finally, there are two Toshiba 4TB enterprise drives I got from Amazon, which are set up in a ZFS mirror.
For the software side, I am running TrueNAS Scale as my NAS OS here. It's free, and it's great. It also gives us some requirements and suggestions to start with. Like most NAS OS's, you cannot mix differently-sized hard drives in the same pool (this is stipulated by ZFS). Many people use Unraid for that reason, since you can sometimes lower your spend on storage devices that way. So - we need two identical 3.5" hard drives. Next TrueNAS doesn't put a lot of load on it's boot media, even requiring a mere 16GB minimum. Finally, TrueNAS requires a minimum of 8GB of RAM - additionally, the common ZFS wisdom is to have 1GB of RAM per TB of storage.
The cheapest way I've found to start (when building something small) is to look for business PCs. Large companies are constantly getting cycling their fleets and so there are thousands of different business-oriented Mini PCs available on sites like Ebay. Generally, there are three form factors:
Thin Client/1L: Often called 1 liter PCs, these are the smallest. They usually take 1 M.2 (SATA or NVMe) drive and sometimes 1 2.5" SATA drive as well. Newer models may come with 2 or more M.2 slots. Power is supplied by an adapter, which is often not included. ServeTheHome has a series about these units called Project TinyMiniMicro, named for the three major brands. Lenovo (Tiny), HP (Mini), & Dell (Micro).
SFF (Small Form Factor): These units are slightly larger, but usually have the same processors as their smaller cousins. The primary differences lie in expansion: they take full-size ram, have PCIe slots, can take at least one 3.5" drive, and sometimes more than one 2.5" drive. They are powered by a standard IEC power cord and an internal power supply. This is what we'll be looking for.
Tower: These are the largest, and are the size of an average PC tower. They have the most number of PCIe slots, drive, slots, ram slots, etc.
The reason that SFF is the most optimal in this situation is that it strikes a balance between expansion capability and cost. You could absolutely buy a tower PC for a bit more $; if you're planning to expand in the near future, I'd go with that honestly.
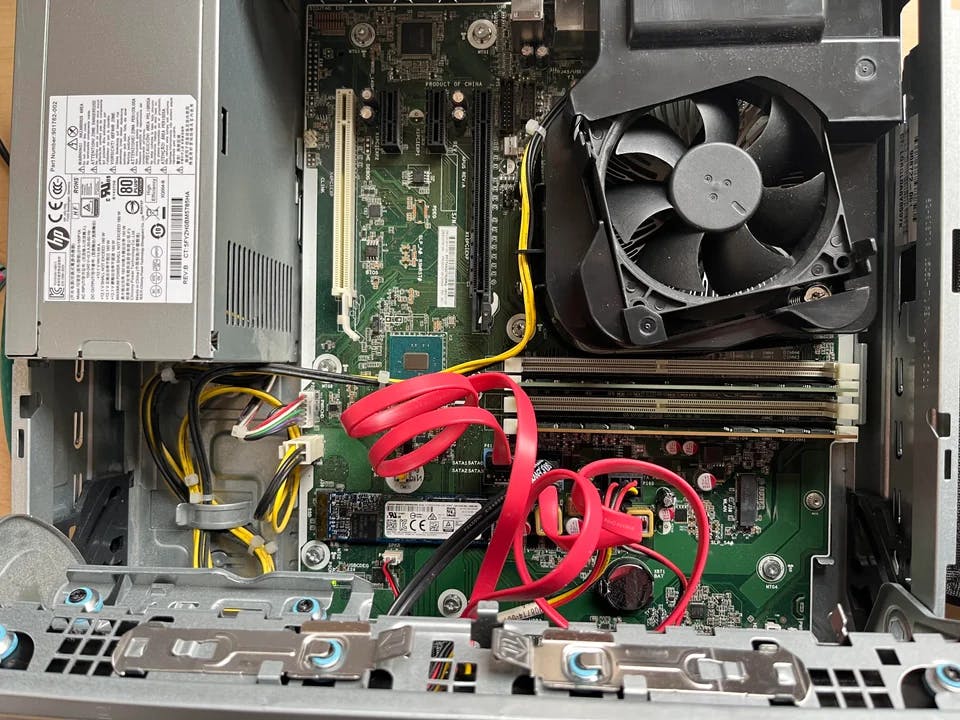
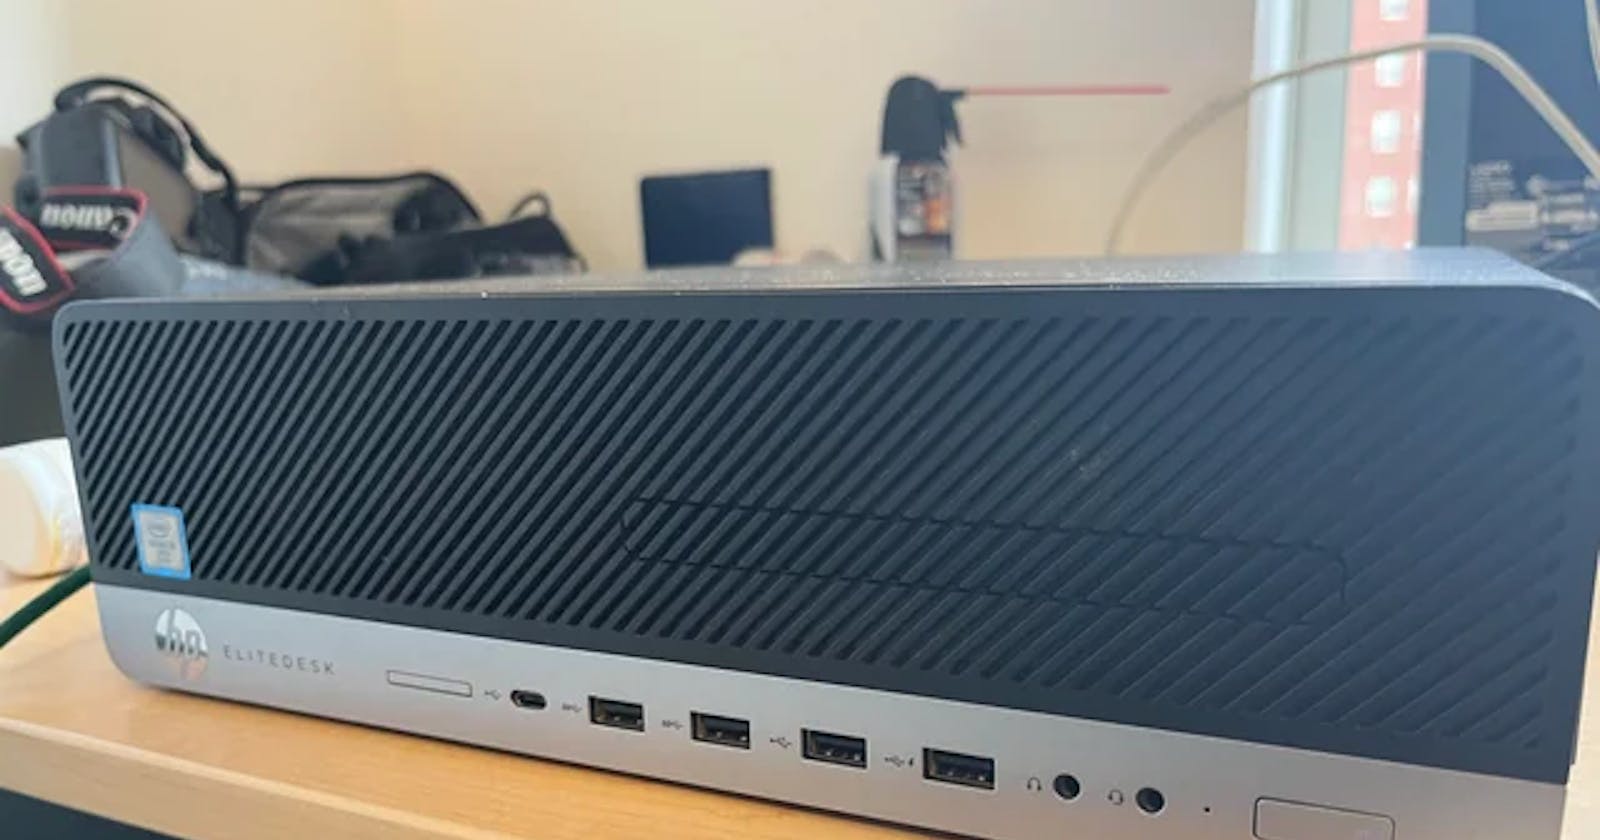
My NAS is based on an HP Elitedesk 800 G3. This unit can hold 2 3.5" disks, 1 2.5" disk, and 1 M.2 NVMe drive. I highly recommend these because they can be had for a decent price, especially if you're patient. I got mine for ~$29 ($45 shipped) because I lurked on the item page long enough that the seller sent me an offer for 15% off. Do note, there is a difference between the Elitedesk and Prodesk units. Prodesks only have 1 3.5" slot (and less PCIe slots) and are thus not suitable.
You can also find similar SFF units from Dell & Lenovo. As far as I can tell, Dell SFF units don't have more than 1 3.5" bay. I think Lenovo makes some viable options similar to HP, but in my experience they're hard to come across. Above all, the best bit of advice I have here is to find & read the manual! That will tell you how many drives the unit can hold as well as other key specs.

The inside of my NAS with the drive bays lifted out to reveal the NVMe drive.
Boot & Cache SSDs
I knew my NAS was not going to be under heavy load so I just searched for drives on Ebay. My main guiding principle in this case was get used hardware from reliable brands instead of new hardware from unknown brands. That is why my boot SSD is Kingston & my cache drive is from Toshiba. Both are cheap used parts from Ebay but I have trust in those brands.
Mass Storage
For and my choice of hardware and NAS OS (TrueNAS), we need two identical drives for this build to serve as the actual mass storage. There are a few tips and resources I have for this process:
You don't need NAS drives - but you do want new drives. I almost fell into this trap while spec-ing parts for this build. NAS drives are built for large deployments with lots of other vibrating drives nearby, high read/write loads, and high temperatures. This system will not see any conditions like that. Modern desktop hard drives are plenty reliable for this purpose as long as you get new drives. Unlike flash storage, HDDs are much more susceptible to wear over time since there are moving components inside.
In searching for drives, I highly recommend the website DiskPrices.com. This is how I found my mass storage drives. I had decided on ~4TB as a sweet spot so I set that and then made sure it was only showing Internal 3.5" drives (found under the Rotational section) - here is a link to my parameters. I also avoid drives from unknown/generic brands like MaxDigitalData and anything that says Renewed or Refurbished. My drives came from Toshiba but Seagate, HGST, or Western Digital should also suffice.
Assorted Parts
In building a system like this, you will almost certainly find yourself missing little things like certain cables or screws. I find that the SFF pc's generally do include power cords - mine did, however 99% of them use standard IEC power cables. I had to buy SATA cables and the special screws required to mount drives in the HP chassis. Ebay usually comes in clutch here.
Conclusion
At the time of publishing, my NAS has been running for about 3 months nonstop. I've found it to be pretty reliable and I do recommend building this way for homelab purposes.
Final Pricing
| Item | Cost (rounded up for simplicity) |
| HP EliteDesk 800 G3 | $44 (shipped) |
| SKHynix 8GB RAM stick | $11 |
| SanDisk 120Gb SATA SSD (boot disk) | $11 |
| Toshiba 256Gb NVMe M.2 (L3 ARC disk) | $16 |
| Toshiba 4Tb HDD (mass storage) | $100 ($49 each) |
| Assorted Parts | $15 |
| Total | $197 |
Future Expansion
I'd like to start building a media library using Jellyfin at some point in the future, which I will almost certainly write about. One of the features of my machine I have yet to use is the 4 half-height PCIe Gen 3 slots. In order going from closest to furthest from the CPU, there is a x16, 2 x1, and a x4 slot. As I upgrade my network I plan to put a network card in the x4 slot and either a basic GPU (for Jellyfin transcoding) or an M.2 NVMe carrier card in the x16 slot - this depends on whether my system supports PCIe bifurcation.

